Easy Crochet Dishcloth Pattern: Free Beginner Guide
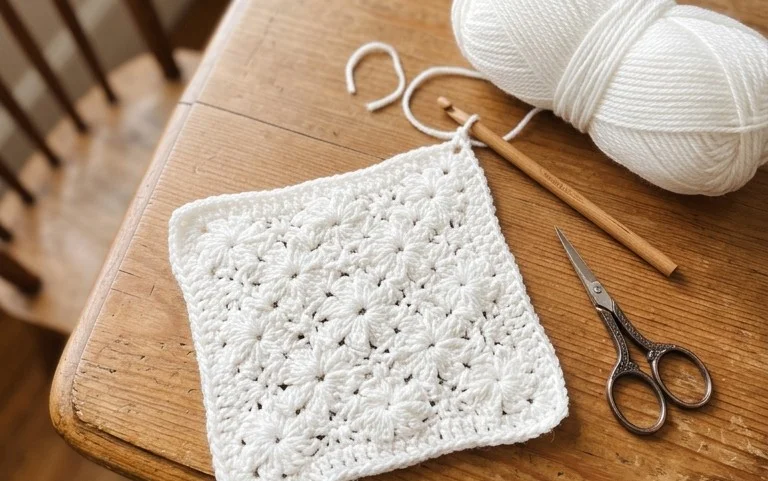
This thick dishcloth feels firm and scrubby in your hand, offering just enough grit to clean pans without damaging non-stick coatings. You will find that cotton yarn provides the exact weight needed for a sturdy, long-lasting household item. These small squares suit beginners who want a quick win or makers looking for a practical gift to bundle with a bottle of soap. You get to focus on a repetitive stitch pattern that builds a consistent, dense fabric row by row. Mastering this simple technique allows you to gain confidence in your tension and edges while creating something useful for your daily kitchen routine.
Why You’ll Love This Pattern
The Classic Crochet Dishcloth provides a rhythmic, meditative experience for the hands while producing a highly functional household tool. This pattern relies on a simple, repeating stitch texture that creates a dense fabric capable of scrubbing stubborn spots without scratching delicate surfaces. It is an ideal project for using up small amounts of leftover cotton yarn from larger projects. Because it consists of only basic stitches, it is portable enough to toss in a bag for travel. Once you master the rhythm of the rows, you can complete one in an evening.
I managed to finish three of these over the weekend while watching television. The texture holds onto soap much better than the store-bought sponges I used to buy.
— Sarah, home crafter
Pattern Overview & Skill Level
- Skill Level: Beginner
- Approximate Time: 1 to 2 hours
- Construction: Flat panel worked in rows
- Finished Dimensions & Sizing: 8 inches by 8 inches
Materials & Supplies Needed
- Yarn: Worsted weight #4, 100% cotton, approximately 60 yards. Cotton is essential for its absorbency and heat resistance.
- Hook Size: 5.0 mm / H-8
- Notions: Tapestry needle for weaving in ends, scissors.
- Safe yarn substitutions: You may use a cotton-acrylic blend, though it will be less absorbent than pure cotton. Avoid wool or synthetic fibers like polyester acrylic for kitchen use, as they do not handle heat well and may melt or retain odors.
Stitch Guide & Abbreviations (US Terms)
- ch = chain
- st(s) = stitch(es)
- sc = single crochet: Insert hook into stitch, yarn over, pull up a loop, yarn over, pull through both loops on hook.
- dc = double crochet: Yarn over, insert hook into stitch, yarn over, pull up a loop, yarn over, pull through two loops, yarn over, pull through remaining two loops.
- sl st = slip stitch: Insert hook, yarn over, pull through stitch and loop on hook.
- Seed Stitch: A pattern alternating dc and sc across the row to create a bumpy, nubby texture.
Step-by-Step Pattern Instructions
Main Dishcloth Body
The cloth is worked in rows. You will turn your work at the end of each row.
- Row 1: Ch 31. Dc in the 4th ch from the hook and each ch across. (29 sts)
- Row 2: Ch 1, turn. Sc in the first st, dc in the next. Repeat sc and dc across the row. (29 sts)
- Row 3: Ch 2, turn. Dc in the first st, sc in the next. Repeat dc and sc across the row. (29 sts)
- Rows 4 through 28: Repeat rows 2 and 3 until the piece forms a square.
Finishing
After finishing the final row, do not fasten off immediately. Work a border of sc around the entire perimeter to give the edges a clean, finished appearance. Work 3 sc in each corner to allow the piece to lay flat. Once you return to the starting corner, join with a sl st to the first sc of the border. Cut the yarn, leaving a 6-inch tail, and weave it securely into the back of the fabric using your tapestry needle.
Care & Washing Instructions
- Machine wash in warm water on a gentle cycle to preserve the shape of the stitches.
- Lay the dishcloth flat on a clean towel to dry, smoothing it out with your hands to remove any curling edges.
- If the cloth becomes distorted from use, dampen it lightly with water and pull it into a square shape, then allow it to air dry completely.
Pro Tips & Common Mistakes to Avoid
Maintaining consistent tension is the most important part of this project. If your stitches are too tight, the cloth will be stiff and difficult to use; if they are too loose, the fabric will lose its scrubbing power. Practice keeping your yarn tension steady by holding the working yarn firmly through your fingers. If you struggle with the edges, place a stitch marker in the first and last stitch of every row to ensure you do not accidentally skip them, which would cause the cloth to slant into a trapezoid shape.
Weave your ends in multiple directions—horizontally, vertically, and diagonally—to ensure they do not pull out after repeated washing. To adjust the size, simply add or subtract chains in multiples of two for your starting row. Keep in mind that a larger cloth requires more yarn, so ensure you have enough yardage if you decide to go significantly beyond the 8-inch square dimension.
Frequently Asked Questions
Can I use a different size hook for this project?
You can use a 4.5 mm or 5.5 mm hook to change the drape of the fabric. A smaller hook creates a tighter, denser cloth, while a larger hook creates a softer, more flexible fabric that dries faster between uses.
Is this pattern suitable for someone who has never crocheted before?
Yes, this is an excellent starter project. It uses only two basic stitches and requires no complex shaping, increases, or decreases, allowing you to focus entirely on learning how to control your hook and yarn.
Can I sell the dishcloths I make from this pattern?
You are welcome to sell finished items you create yourself. Please credit the original design and use your own photographs to market your products.
Why does my dishcloth have holes or gaps in the corners?
Gaps in the corners usually result from pulling the stitches too tightly or failing to place the correct number of stitches when turning the corner. Always use three single crochet stitches in each corner during the border phase to provide enough yarn to make the turn smoothly.
Your new handmade dishcloth serves as a reliable addition to your sink, helping you tackle everyday messes with confidence. Consider crocheting a set in contrasting shades of navy and white to brighten your kitchen counter or adding a hanging loop to the corner for faster drying times. Seeing your finished work in your home is quite rewarding, so take a quick photo of your stack and share it online with friends. Visit the blog archives for more free patterns to build your collection of handmade goods.