1 Hour Crochet Projects: Quick and Easy Free Patterns
A small, firm basket sitting on your desk adds a sense of order to a cluttered space. This simple project relies on the moss stitch to create a dense, fabric-like wall that holds its shape without extra support. You will find that chunky cotton yarn makes the work fly by, allowing you to complete a useful home accessory in a single afternoon. Beginners often enjoy this pattern because it requires only basic knowledge of chaining and single crochet. By learning how to transition from a flat base to upright sides, you gain a versatile skill for future storage projects.
Why You’ll Love This Pattern
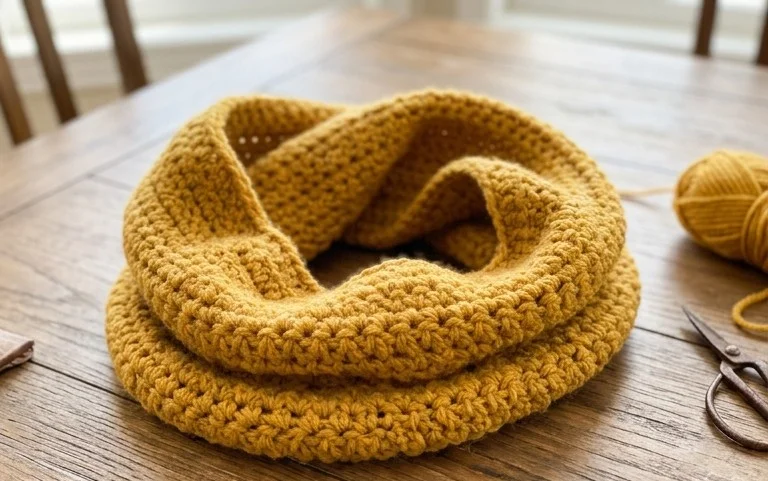
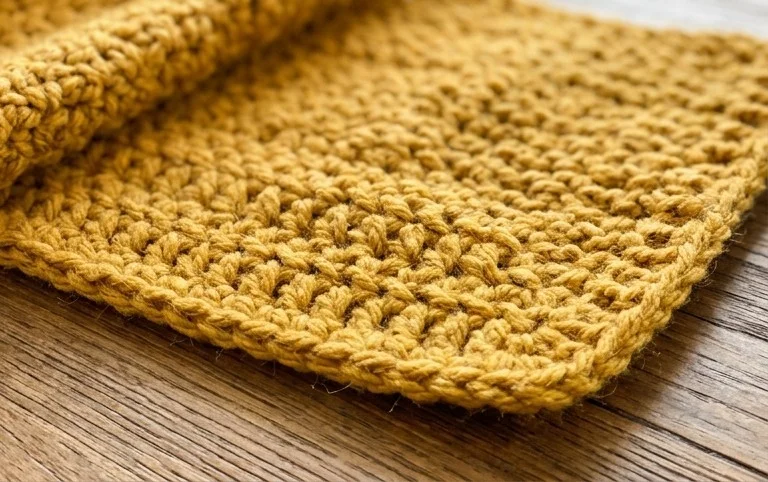
This beginner-friendly project creates a structured, durable crochet basket using the moss stitch, which gives the fabric a woven appearance. Because it utilizes a chunky yarn weight, the sides of the basket remain stiff and upright without the need for additional plastic inserts or stiffeners. It is a scrap-yarn friendly pattern that works up in under two hours, making it an ideal choice for last-minute handmade gifts or organizing small desktop supplies. The repetitive nature of the moss stitch provides a calming rhythm, suitable for mindful crafting while watching a movie.
I finished this basket in one afternoon and it holds all my stitch markers perfectly. The stitches look so clean and professional.
— Sarah, hobbyist crocheter
Pattern Overview & Skill Level
- Skill Level: Beginner
- Approximate Time: 1.5 to 2 hours
- Construction: Worked in joined rounds starting from a flat circular base, then transitioning to sides worked in continuous rounds.
- Finished Dimensions: 6 inches in diameter and 4 inches in height.
Materials & Supplies Needed
- Yarn: Super Bulky #6, 100% Cotton, approximately 80 yards. Cotton provides the necessary structural integrity for the basket walls.
- Hook Size: 8.0 mm (L-11).
- Notions: Stitch marker, tapestry needle, and scissors.
- Yarn Substitutions: You may use a bulky #5 yarn held double, though this will increase the final weight of the piece. Avoid acrylic yarns, as they tend to stretch too much and will result in a basket that collapses under the weight of items stored inside.
Stitch Guide & Abbreviations (US Terms)
- MR = Magic Ring
- ch = chain
- sc = single crochet
- inc = 2 sc in same st
- sl st = slip stitch
- st(s) = stitch(es)
- Moss Stitch = [sc in next st, ch 1, skip 1 st] repeat across.
Step-by-Step Pattern Instructions
Basket Base
- Rnd 1: MR, 6 sc into ring. Join with sl st to first sc. (6 sts)
- Rnd 2: Ch 1, inc in every st around. Join with sl st. (12 sts)
- Rnd 3: Ch 1, [inc, 1 sc] 6 times. Join with sl st. (18 sts)
- Rnd 4: Ch 1, [inc, 2 sc] 6 times. Join with sl st. (24 sts)
- Rnd 5: Ch 1, [inc, 3 sc] 6 times. Join with sl st. (30 sts)
- Rnd 6: Ch 1, [inc, 4 sc] 6 times. Join with sl st. (36 sts)
Basket Sides
- Rnd 7: Ch 1, working in BLO, 1 sc in each st around. Join with sl st. (36 sts)
- Rnd 8: Ch 1, [sc in next st, ch 1, skip next st] repeat around. Join with sl st. (36 sts)
- Rnd 9-16: Repeat Rnd 8. The moss stitch will create a dense, sturdy wall. (36 sts)
- Rnd 17: Ch 1, 1 sc in every sc and ch-space around. Join with sl st. (36 sts)
Finishing
Fasten off the yarn, leaving a 6-inch tail. Use the tapestry needle to weave the end through the final round of stitches to secure. Fold the top edge down slightly if a lower-profile basket is desired, or keep it upright for maximum storage volume.
Care & Washing Instructions
- Hand wash in cold water using a gentle detergent to preserve the structure of the cotton fibers.
- Lay the basket flat on a clean towel to dry, reshaping it while damp to ensure the base remains perfectly circular.
- Avoid machine drying, as heat can cause the cotton to shrink or lose its stiffness.
Pro Tips & Common Mistakes to Avoid
- Maintain consistent tension by holding the yarn taut; if your stitches are too loose, the basket will sag rather than standing upright.
- Place a stitch marker at the beginning of each round to avoid losing your count when switching to the moss stitch pattern.
- Weave in your ends by traveling through the underside of the base stitches rather than the visible surface, ensuring a clean, finished look.
- Adjust the size by adding or subtracting base increase rounds; remember that increasing the base diameter will require more yarn for the taller sides to remain proportional.
Frequently Asked Questions
Can I use a smaller hook for a tighter weave?
Using a smaller hook will make the basket much stiffer and harder to crochet. It is recommended to use the suggested 8.0 mm hook to maintain the intended gauge and structural balance.
Is this pattern suitable for beginners?
Yes, this pattern uses basic stitches and simple increases. If you are comfortable working in the round and understand the difference between back and front loops, you can complete this project easily.
Can I sell the baskets I make from this pattern?
You are welcome to sell finished items made from this design, provided you credit the pattern designer in your listing. Do not sell or distribute the pattern itself.
How do I make the basket taller?
Simply repeat the moss stitch rounds until you reach the desired height. Note that adding more rounds will consume more yarn, so ensure you have enough material before proceeding.
Your new crochet basket looks great holding spare buttons or loose change on a bedside table. You can personalize the design by switching to a contrasting color for the final three rounds or by using a smaller hook to create an even tighter, more rigid weave. Please post a picture of your finished work so others can see how your color choices turned out. Check the blog archives for more patterns that take less than an hour to finish if you need a quick gift.